I have to thank my friend Trollometer very much for helping me figure this out. He knows all there is to know about power tools and was extremely patient with me. The belt sander worked fantastic for foam, even though it made an absolute mess. I worked with it in a garden of sorts, outside and had to hose down the foam dust after session. I could barely hose down myself though. I used hairy baby wipes for my arms, face, neck, etc.
 |
| I used contact cement to glue these together. |
I was very afraid that the wood I used would be too heavy or too light for the foam and it would either be difficult to lift or the wood would bend with the foam and become too wavy. Thankfully, it was amazingly solid while not being too heavy.
So, I am firmly in the camp that you should cosplay whatever you want and however you like. It helps if your body type is similar to that of that character you are cosplaying, but it is not important at all. Body positivity (and overall positivity) is super important. With that being said, Cloud for me is very personal. I could write an entire study about how transformative it was for me, maybe some day. So, officially Cloud is 173 cm tall, which is exactly my height. The Buster Sword is officially 180 cm tall. I wanted to get it right, and I did!
 |
| Obligatory mirror WIP selfie. |
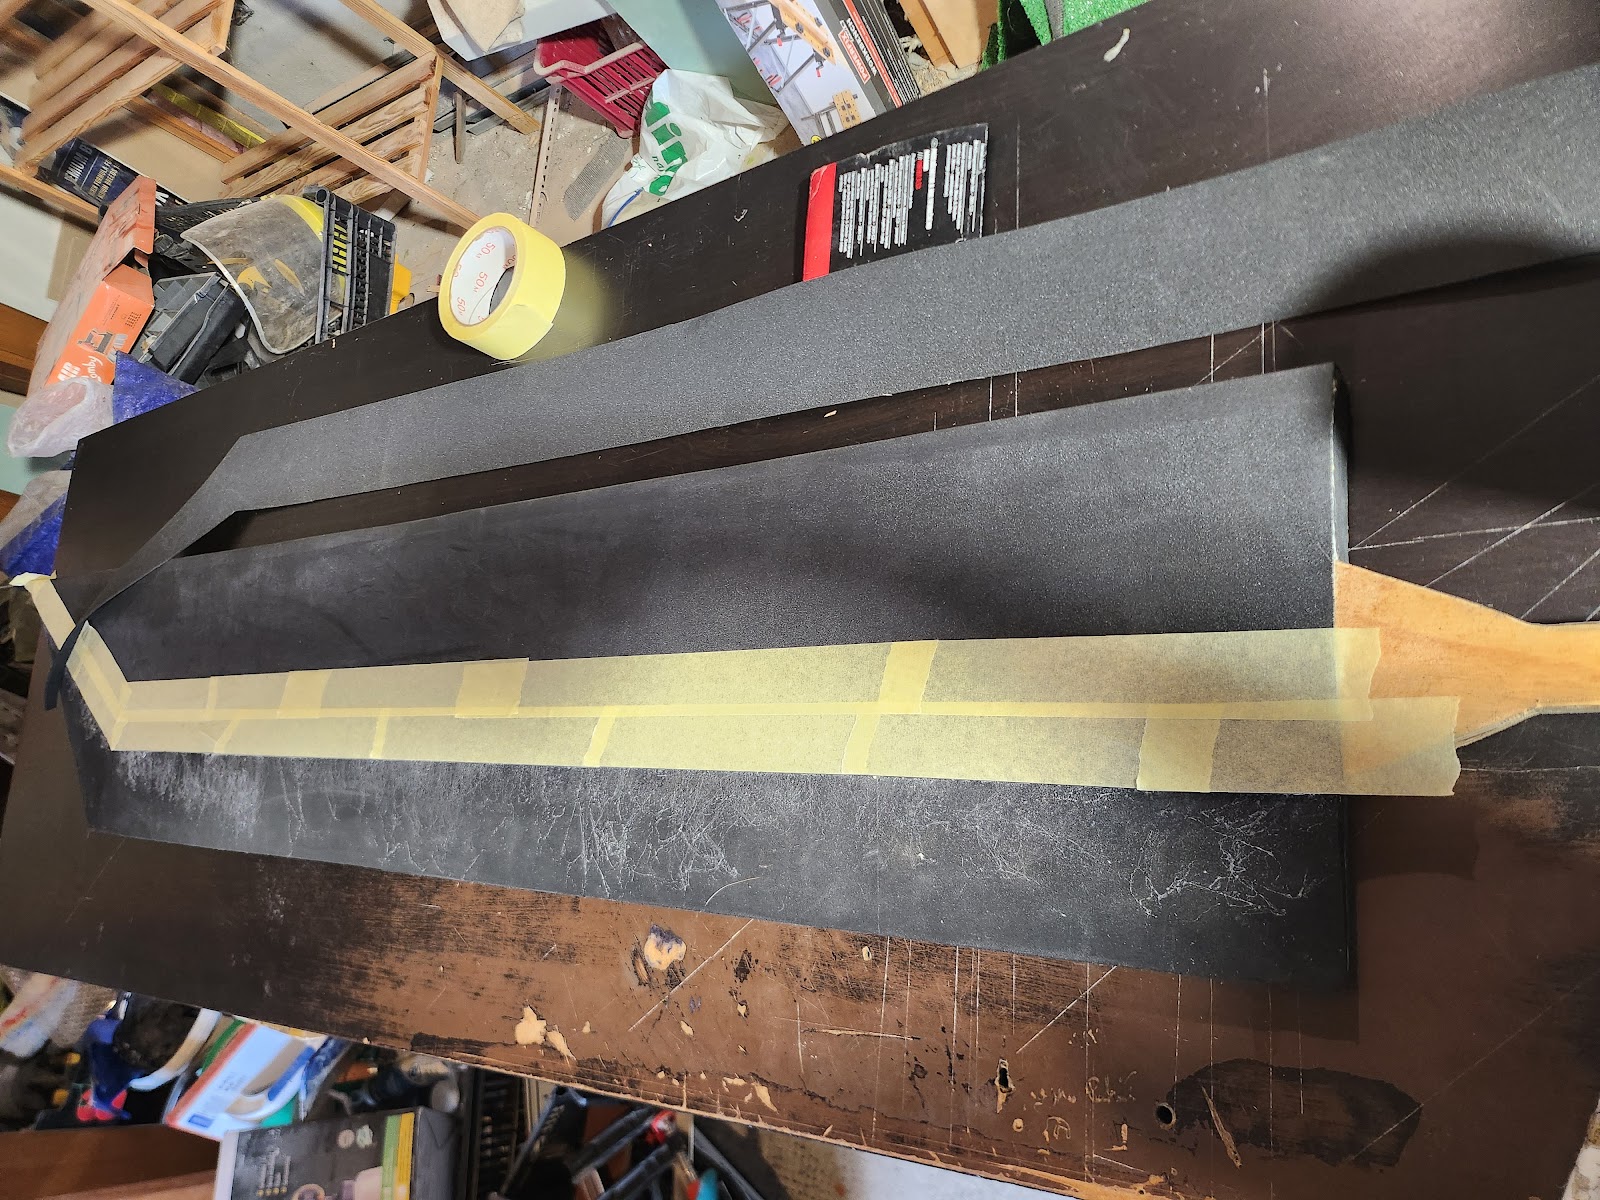
In an afternoon I used the belt sander to make the reclining edge for both sides, I tried to make it as even as possible. It was not important for me to get it smooth and looking very nice, because I was planning to cover it in a 2mm foam sheet later, anyway.
 |
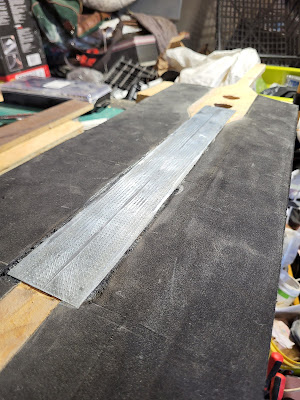
| The reclining edge was very important for the overall shape. |
 |
| I have had a steady supply of non-alcoholic beer on hand. |
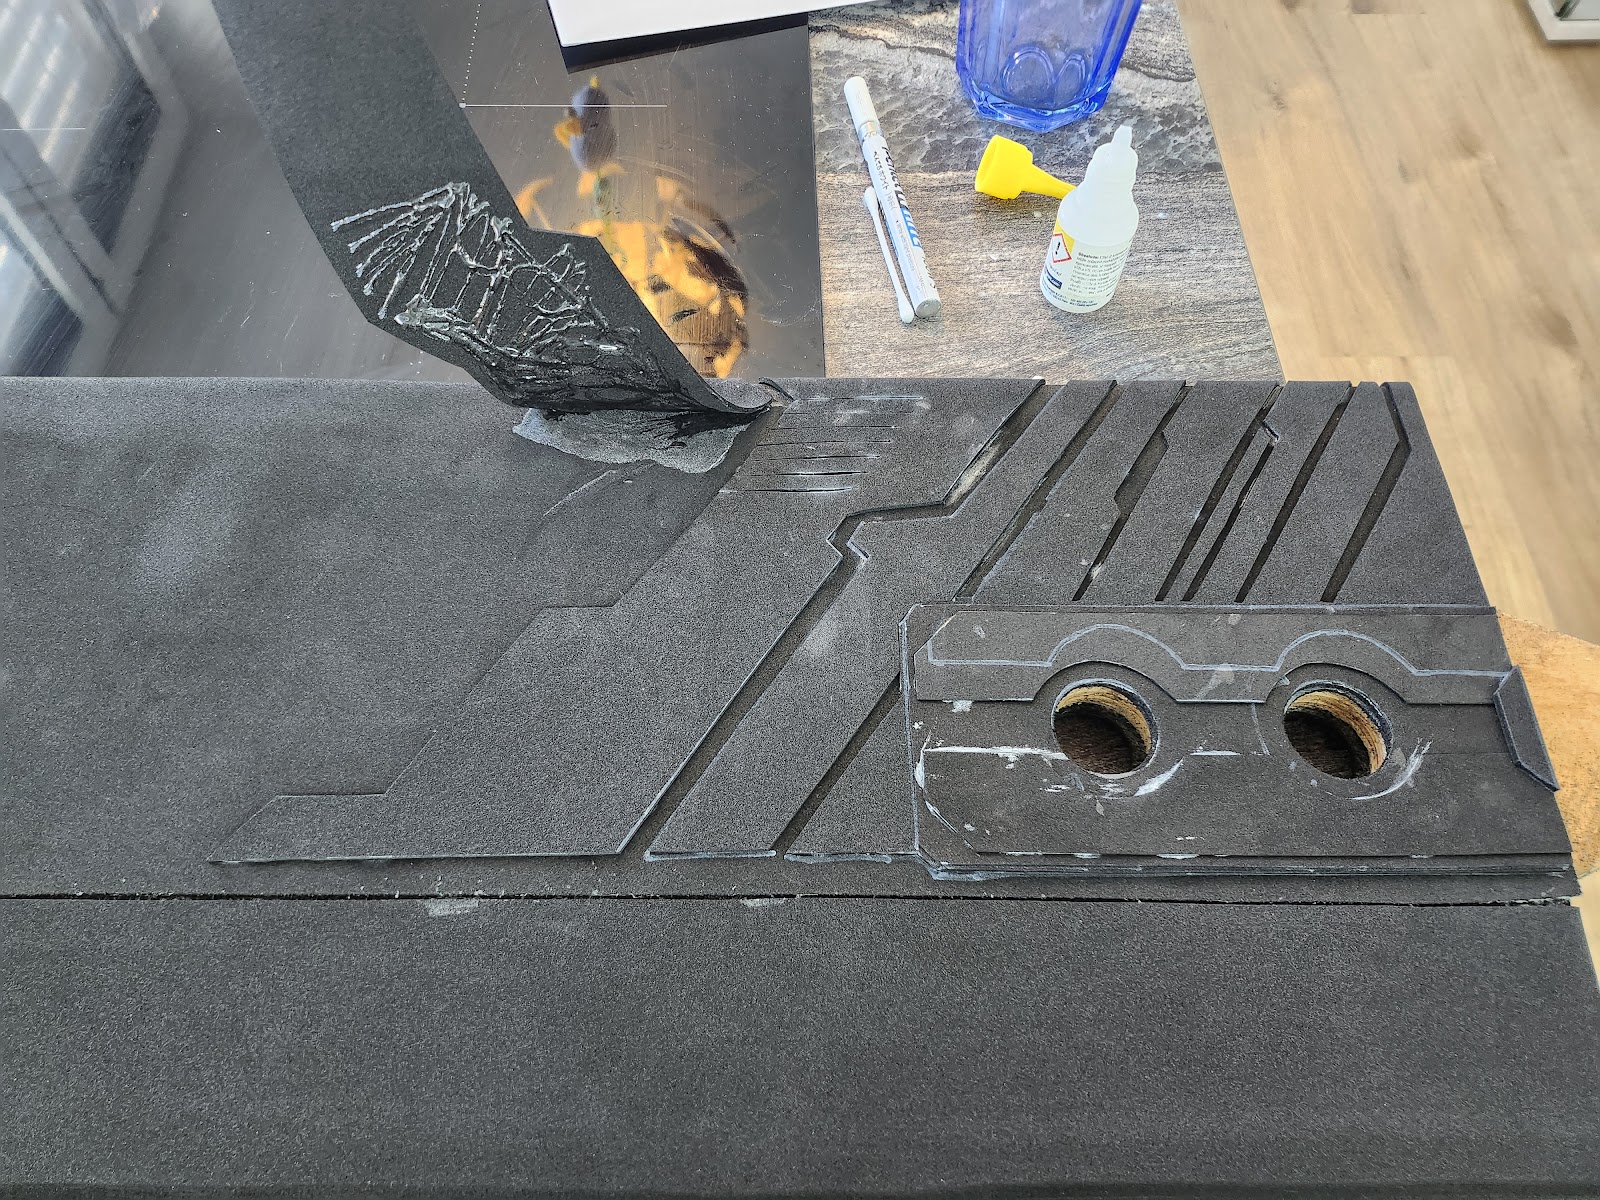
I was planning to create a smooth surface of the sword by hiding the rough 10mm plates in another 2mm thin sheets that would also have all the scratches, weathering and details on it. Before I did this however, I had to figure out the magnetic part of the sword. Originally I wanted to put one magnet inside the sword and another onto my harness. I got a suggestion from Trollometer to just inlay a metal sheet into the wooden core, which was a brilliant idea.
Funny fact about the Buster Sword for every FFVII fan. Cloud and Zack wear it differently.
They both have it on their backs, but each one has it on a different side. Knowing myself I had to make sure three times that I am inlaying the metal sheet in the correct side.
I had simple metal plates from old computers or even a rather long metal sheet from... who knows where? I considered cutting an entire shape of the sword from metal. Which I did.
 |
| Too heavy. |
Eventually, I decided against it, because while they were very light on their own, they added up and made it way too heavy.
 |
| I decided to use a single sheet and cut the space for it into the wooden core. |
A single metal sheet would have to suffice and I put it just beneath the Materia slots, where it would make sense for it to be attached onto my back.
 |
| I also used a carving tool to make it go easier. |
Once I was happy with how the inlaying would look, I used contact cement to glue it onto the wooden core and the rest of the foam around it.
 |
I let it dry overnight in this state, praying it would stick.
|
And voila! It looks great and fits perfectly. The contact cement also worked its magic and made sure that the metal sheet stuck to the wood.
 |
| Smoother than a Samsung smartphone. |
It was time to create the top layers and to do that, I had to make a fitting pattern. What I used for the base would not work, because this time the top layers would be divided into "top" and "bottom". With the bottom being what eventually becomes the reclining edge. The top would have to go over one side of the sword, then over the middle part - which was now 20 mm thick and then once again over the other side. I wanted this piece to fit perfectly, it would start near the beginning of the edge and end at the same place on the other side. For the pattern making process I will next include a series of photos with captions to better explain it all.
 |
| I used a basic cloth patterning paper for this. |
 |
I traced the basic shape.
 | | Then cut out the reclining edge. |
 | I did the same for the other side, because despite my best efforts,
I knew that these sides were not 100% identical. |
 | I added the extra space for the middle/top part of the sword.
|
|
After patterning and cutting it out, I also drilled matching holes into this new coat. I tried using the same circular cutting attachment for a drill and I got 3 out of 4 hole correct! Which is more than I hoped for. I had to fix the remaining one with kwik-seal (which is my favorite fixer for foam mistakes).
 |
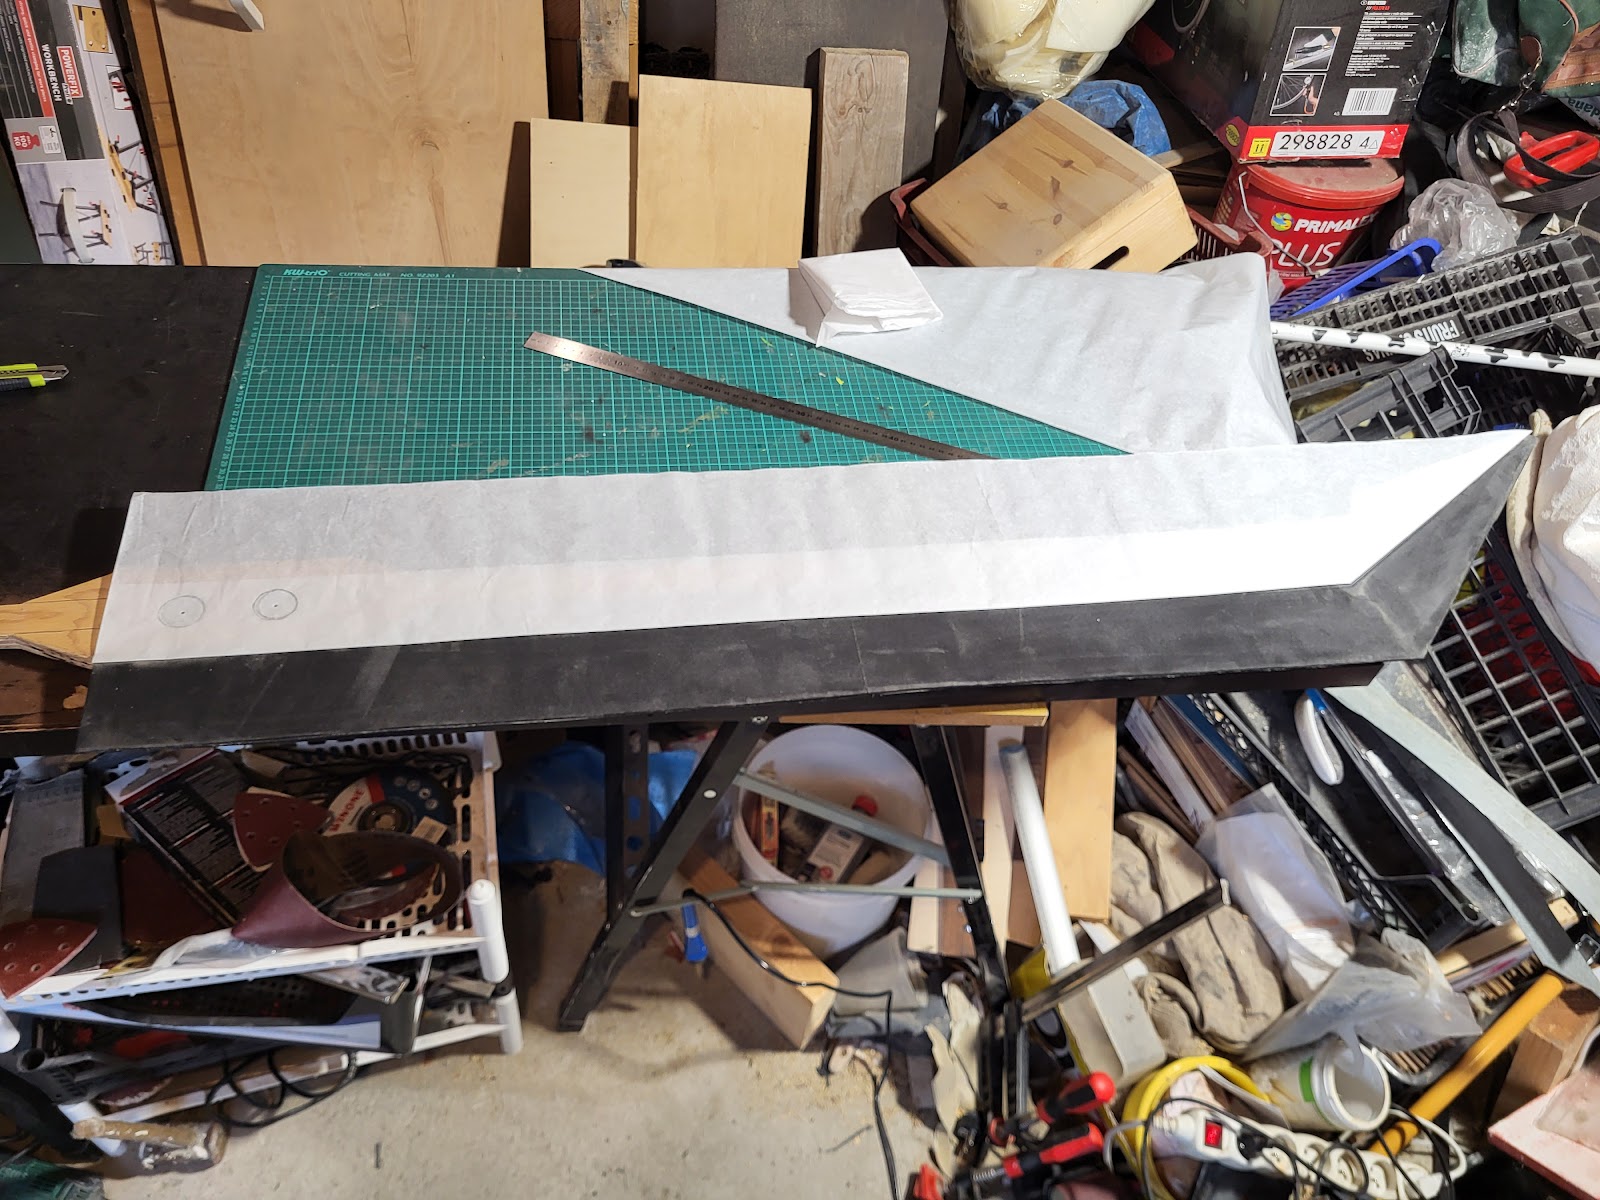
This is the top layer patterned.
 | And now cut out.
|
|
 |
| You can see how I messed up the last Materia slot. |
Anyway, I was fast approaching that phase where it will be getting harder and harder to shape the sword itself, so I wanted to make sure it is as straight and narrow as possible. I decided to heat it up and once again press it tight with planks and holders. I let it be so over a couple of days, just to be sure.
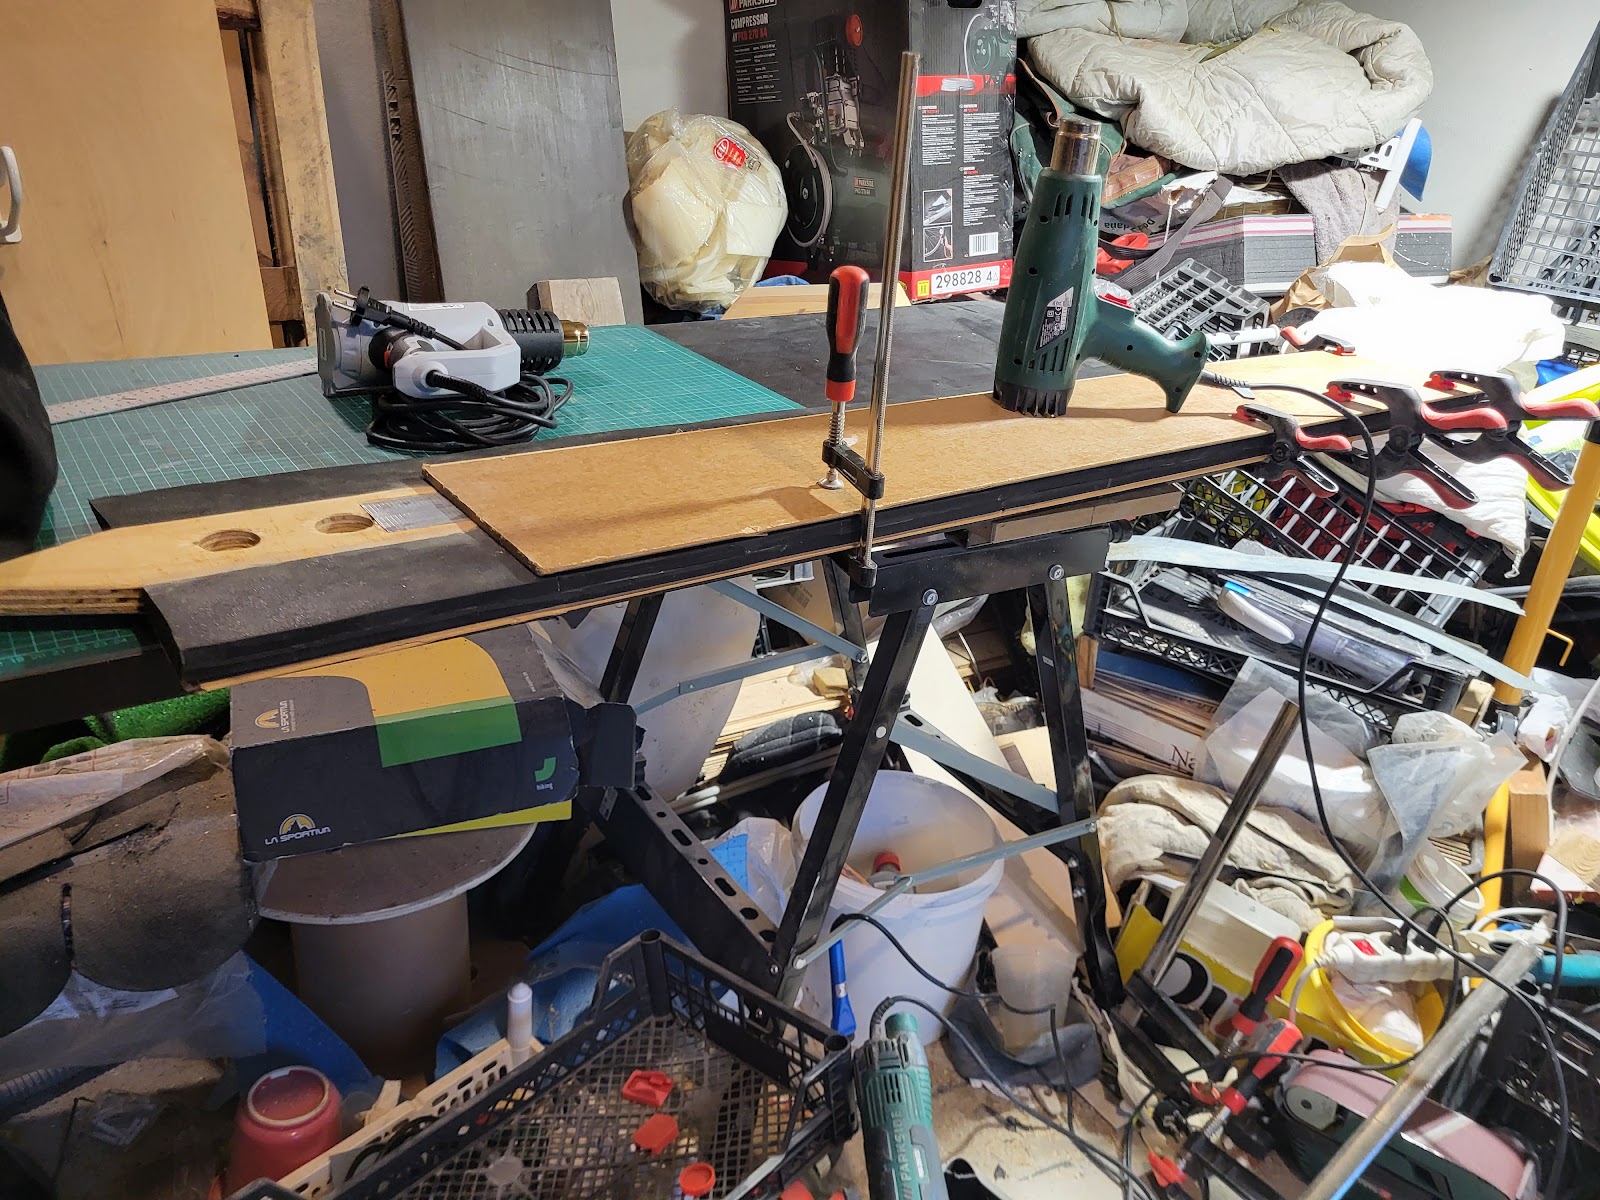 |
| Let the Buster Sword rest for a spell. |
In the mean time, I started patterning the details around the Materia slots. These sort of drove me insane, not because they were difficult (which they were), but mainly because these details had to be mirrored on the other side and be exactly the same! As much as I tried, the two sides of the sword were not an exact 1:1 mirror, there were differences in centimeters. Something you would hardly notice, unless I would pinpoint it to you exactly. It drove me nuts, nonetheless.
 |
| I drew the basic pattern in Corel Draw. |
After making the basic pattern, I realized that these were layers and one was on top of the other. So, I started layering what I could see clearly. I had to boot up the game many times to check which part goes over which part and I really wanted to get it correct.
 |
| Time to draw. |
 |
| Time to cut. |
I finished what preparation and measuring I could and got to cutting out the parts from 2mm EVA HD foam. Sometimes I used tiny manicure scissors, especially around long, but tiny details. Wherever possible I helped myself with a heavy metal ruler. I also used scissors for another set of round holes for Materias - which would once again go over the existing holes.
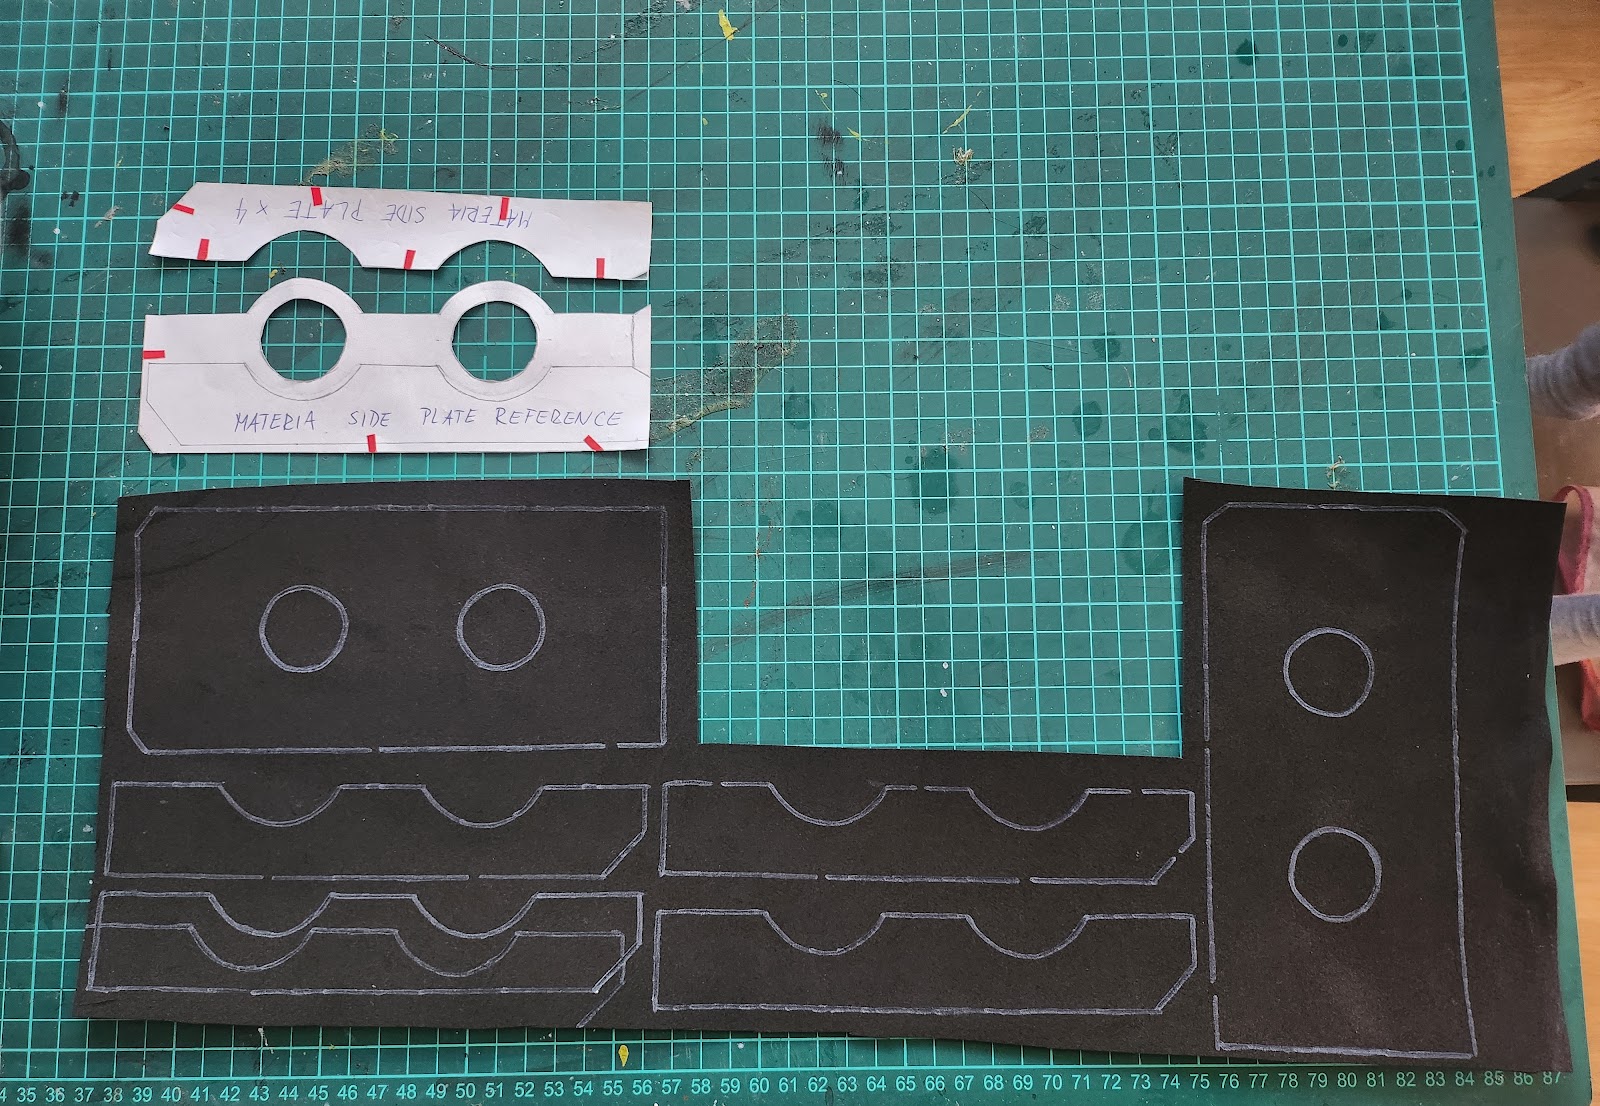 |
| Materia plates. |
 |
| Scissors to the rescue. |
 |
| I was pretty satisfied with the results. |
After several days, I figured it was time to get on with the main blade. I recovered it from the vice grip it was under and upon closer inspection I noticed that it was considerably more straight and narrow.
I started planning how I would wrap the top 2mm layer onto the base. I had to make sure that the top middle part would be glued first and it would stick as much as possible, because it had very sharp edges - the angles were supposed to be exactly 90 degrees on the top.
 |
The top layer is glued with contact cement.
The edges are a nice 90 degrees. |
 |
| You can see the young Buster Sword taking first flight. |
 |
Here you can see what I meant about the 90 degree angle.
|
 |
| The bottom layer of the base sword. |
After both sides were on, I used the belt sander to take away any unnecessary foam and make the edge look like it has been cutting and hitting monsters and robots.
 |
The belt sander surpassed all my expectations,
even though it made a mess. |
With the base blade finished, it was time to start planning how the details would fit onto it. They were all separate parts of 2mm foam and I had to get them exactly into the spots they were supposed to be.
 |
I was very relieved that the parts mostly fit.
I made adjustments where necessary. |
The details were separated into layers, like I mentioned earlier, so I traced and cut the base layer first.
 |
Base layer of the details.
 | Now cut with the second layer of the Materia plates.
|
|
Once again, I used contact cement to glue everything together. For the very tiny details I used superglue.
 |
This part had me nervous as hell,
because I was wrapping the details around the edges of the sword. |
 |
What I could do with contact cement, I did.
What I could not, I used superglue. |
My favorite part of every prop and costume I make are the tiny details that nobody either ever sees or they just do not know they are there. Such was the addition of this tiny "blade edge" detail in FFVIIR, that was not there in Crisis Core before. Why does SquareEnix always have to re-design everything?
 |
It started slowly coming together.
 | Here, look at this detail,
you will never see it again, probably haha.
|
|
I finished the main part of the blade in this way and it was time to start the rest of the sword, now with the guard. To offset the heavy blade, I wanted to compensate somewhat by making the guard from four layers of UHD 10mm EVA foam, which is much sturdier than the classic HD foam. I constructed it in a fashion that left space for the wooden core and I also marked where the additional details/rivets on the guard should be.
 |
| I marked where the rivets on the guard should be. |
 |
Left some space for the wooden core.
 | Here you can see how many layers it was.
|
|
For the outer shell of the guard I used simple 5mm foam sheets. I cut them out slightly bigger than the guard is, because it is supposed to have a lining. I simulated that with the sheets.
I also marked on both the sword and the guard where the two should be connected, since either side would not fit.
 |
There was also supposed to be another panel between the guard and the sword,
which I found out by carefully rotating Cloud in various poses in the in-game photo mode. |
 |
I used kwik-seal to make sure that all the connections were nice and smooth.
 | And made some small incisions to complete the lining details.
|
|
It was time to make the rivets/studs that I marked on the guard - I searched for various objects I could use. I tried foam balls, or door stoppers.
 |
Too big, or too small. These were no good.
 | Finally, I found these furniture supports that miraculously fit exactly like I wanted them to.
|
|
 |
I assembled it all together.
|
Finally, I wanted to figure out how to make one additional detail that is between the guard and the leather grip - some sort of fastening. Instead of wracking my brain, I just took a 10mm EVA foam block and used a rotary tool to sand it out of it. I used the same approach for the pommel of the sword. For the final pommel piece, I used cosplayflex (which is very similar from worbla) and shaped it using a potato peeler. I decided to use cosplayflex, because I wanted the part on which I will be resting the sword the most to be sturdy and resilient.
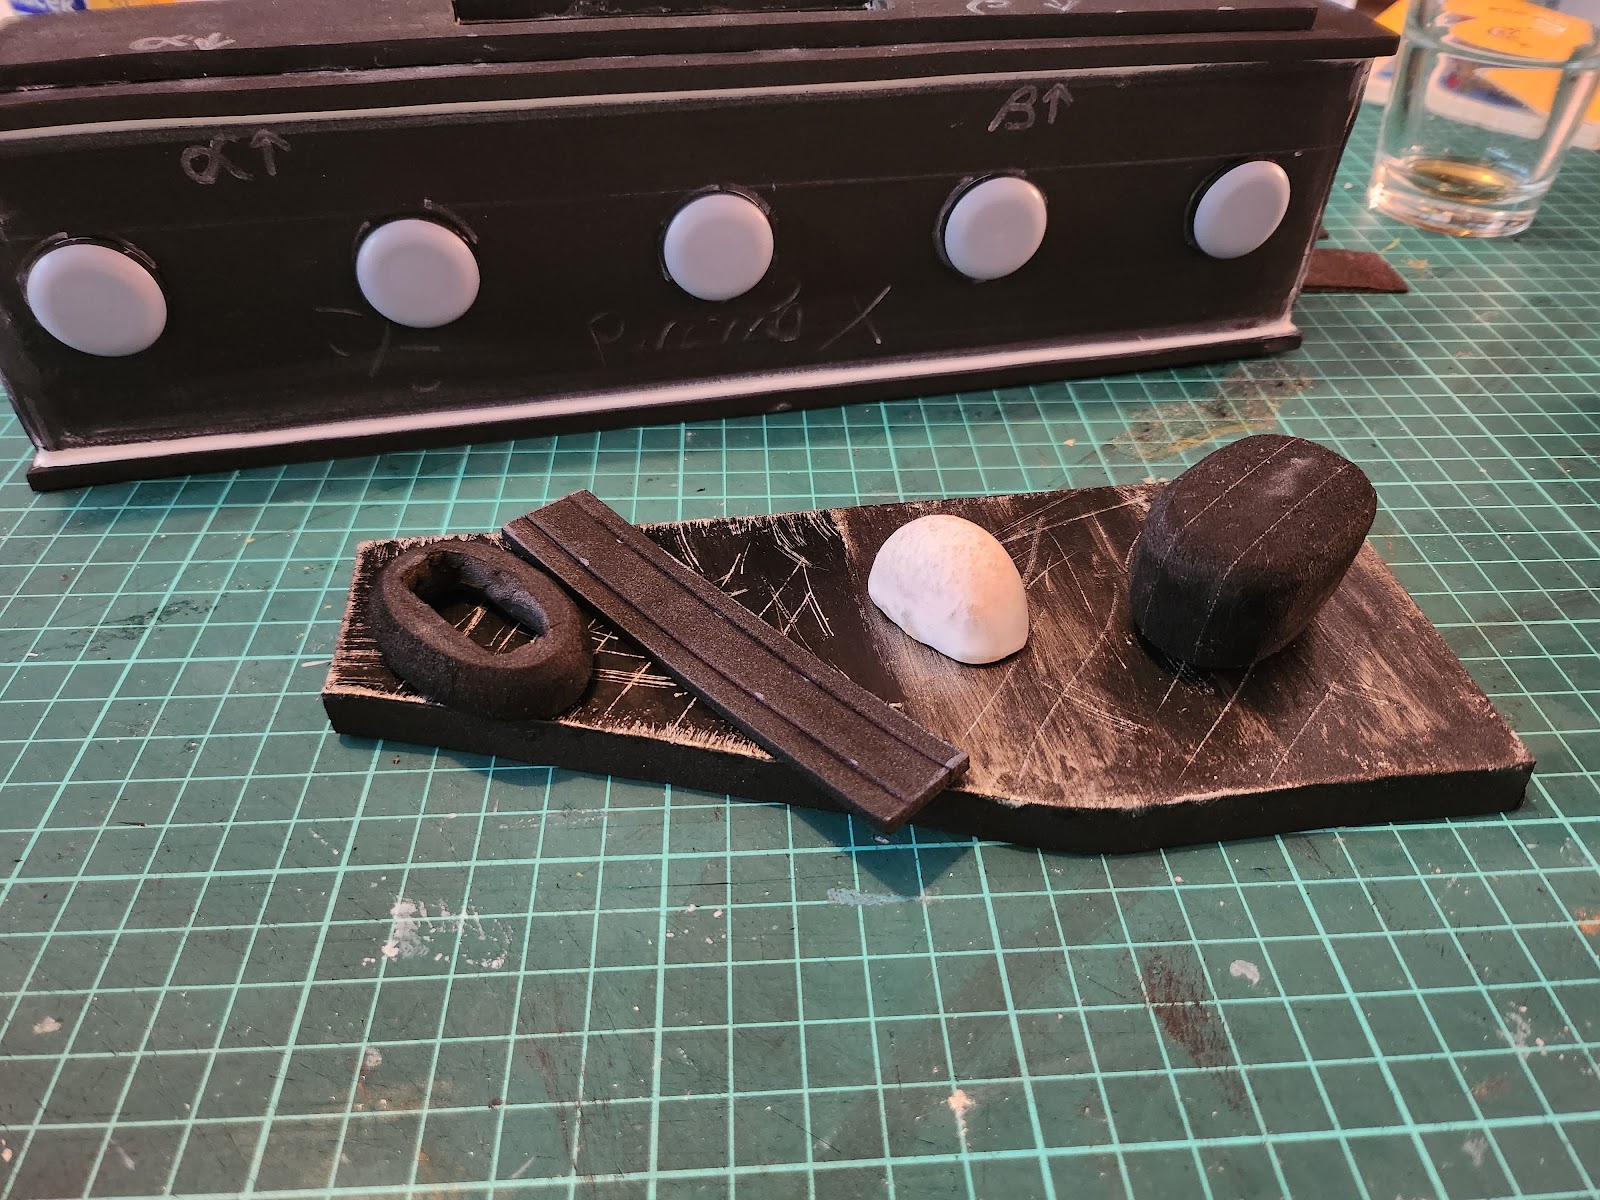 |
From left to right: guard fastening and wrap,
pommel cap and the pommel itself.
For the leather grip I used a sturdy leather piece I had at hand, rolled it into a ball and then lightly dry brushed it with white paint to give it some weathering, as well as better match the references.
 | I did not put it on the sword yet, though.
|
|
 |
I used my favorite primer for foam, Hexflex primer
and covered the entire sword in three layers.
 | The Buster Sword also has a lot of weathering,
so I added that with a dremel and a cutting knife.
|
|
 |
It took a while for all that primer to dry out.
|
After priming, it was time to paint. I did not want to just paint all the scratches onto the sword (in addition to the weathering I already made), I wanted them to be real, actual scratches. I decided to use wax metallic paints (similar to a buff), which have an amazing shiny quality to them. I used a simple sponge to brush them on. Once that would dry, I would cover it with black acrylics and then just use a needle or a pin to scratch the black acrylic to make the scratches.
For the reclining edge of the sword, I combined sandpaper, more primer brushing and wax metallic paints to create a texture that would be similar to the in game references.
 |
This is what the base color looks like.
It is all a wax metallic paint brushed on with a makeup sponge. |
 |
Here is the texture on the edge.
I gently brushed it wish sandpaper while priming and painting. |
The painting process was finished and I also ended up highlighting the edges and some of the details on the blade with more wax paints. Once again I used a makeup sponge, it is best for that kind of paint.
 |
I was very happy with how it turned out.
It had the right amount of metal, scratches and black that I wanted. |
After that I added the pommel and with a self-tapping screw I secured it. Then, it was time to seal it properly. I used a Valour clear coat with a gloss finish. I sprayed on 3 layers and then hanged the sword for a week to let it dry.
 |
| It was drying for a long time. |
And that was finished! I wrapped the grip in the leather I had prepared. What surprised me initially when I was planning the grip is that unlike the Fusion sword (from Advent Children), the Remake Buster Sword has an oval shape, rather than round. Which is a nice detail, since most real life swords have a grip like that.
 |
| Done! |


